This isn’t one of my usual posts as I always like to start with a business case. I intend to create a blog about the business case / solution that created this issue once all the other pieces fall into place, so watch out for that (keep them keen by teasing they say)
The Problem
You might not know there is a problem, but there is. Squirrels are a problem, but not my field of expertise, @dynamiccrmcat will have other opinions.
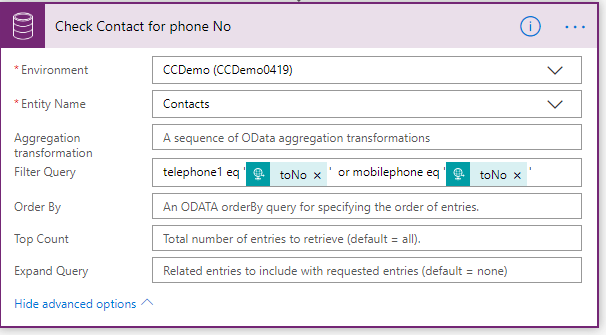
Attachments are a problem. More specifically, trying to add an attachment to D365 via a Flow or PowerApp is a problem. Yes I know we should be using SharePoint or Teams etc, but sometimes you want to keep your data in D365.
You should just be able to “Patch” the Notes entity in a PowerApp with the file you want in the documentbody field of the entity, but you run into problems (bug) with objecttypecodes (it is expecting a GUID and all you know is an entity name).
@JukkaN pointed me to this article on the PowerApp forum which explains the problem in more detail and clearer than I have. This was via a conversation with him and @TattooedCRMGuy where we came to the conclusion that there is a bug in the CDS connector.
So my next thought was to call a Flow from the PowerApp, passing in the file as a parameter. This doesn’t work either. Any which way you try, it ends up with the file being passed as the link to the Azure blob the PowerApp is temporarily using to store the attachment.
Then I started using the developers friend, Google. My first thought is that if I could pass to the Flow a file rather than the URL, this would work. This thought led me to an excellent Youtube video by Paul Culmsee. He shows how to pass a Photo from PowerApps to Flow to save it to Sharepoint. He has the same issue, how to pass a file to flow, and thanks to him, I have duplicated it for saving a file to D365.
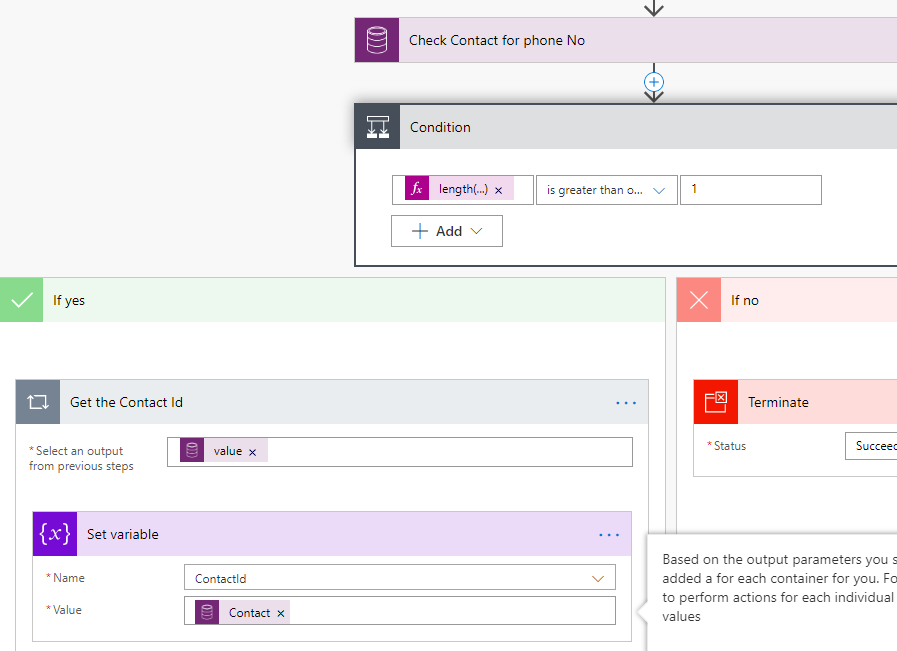
So the logic I have deployed is
PowerApps → Custom Connector → Flow → Custom Connector into D365
2 custom connectors here, this is a relative expensive solution, as the user require a PowerApps Plan 1 license for this which might be an addon to their license.
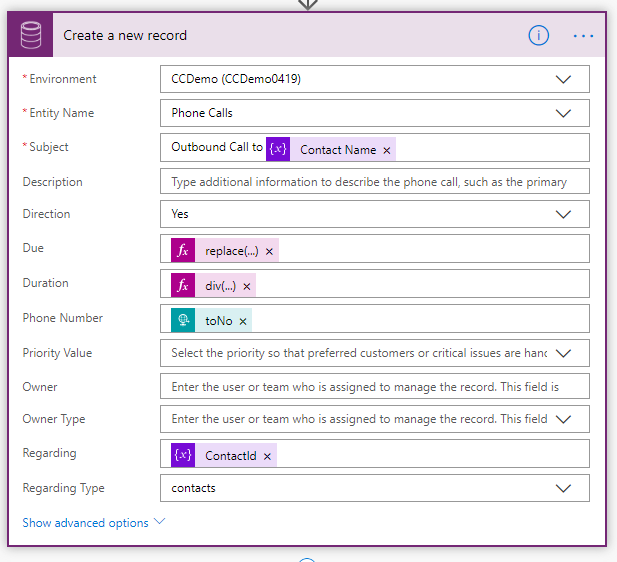
The D365 Connector
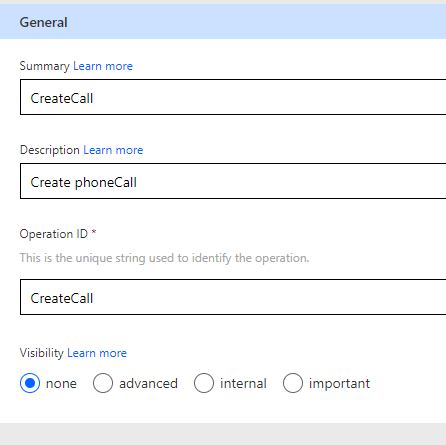
Starting at the final step, I utilised a custom connector like in my previous posts to interact with the D365 API directly. I am not going to go through the method of creating the connector, just this custom action. Again, PostMan is your friend. Using this tool, I generated a JSON template to post against the Annotations entity. Firstly, add an action to the connector.

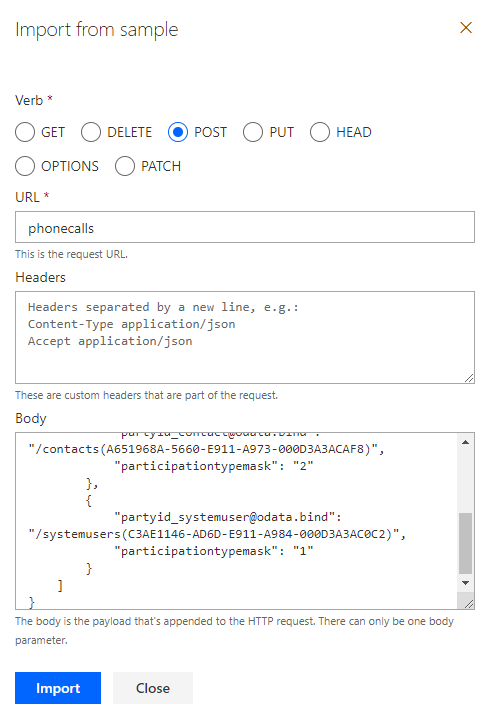
Next, select Import from sample, and populate as below, obviously using your own instance API endpoint.

Couple of things here, Annotation is the name of the table that Notes are stored in. “objectid_contact@odata.bind” is the single value navigation for linking Contact to the note. In the CDS connector, this field is not visible, you are expected to enter a pair of _objectid_value and objecttypecode, which doesn’t work, hence this blog post (I hope they fix it, but not too soon now I have worked it out). Finally, documentbody is the field where the attachment is stored, as a Base64 string. This is weirdly different than the binary data store used by Sharepoint.
Select Import and the first connector is done.
The Flow
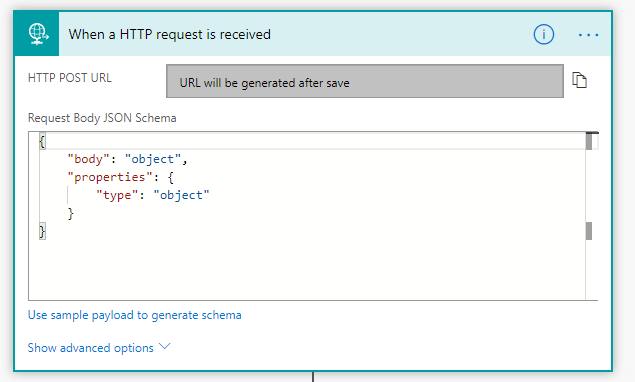
The flow is pretty simple, a HTTP trigger, messing around with the inputs and sending the information to the D365 connector. Simple, but I needed the video by Paul Culmsee to guide me through. The premise being, rather than the usual approach of looking at the body of the web call, we need to take out parts from the query string and the content of the call would be a file. He does a much better job at explaining it that I do, so head over to the video to actually learn.

A standard HTTP trigger. I then use a Compose data operation to take data from the trigger using a formula based on the query parameters passed.
trigger()['outputs']['queries']['filename']
This states that I want find and store the filename parameter passed in the url when the trigger was triggered
The Get File Body does the same but looks at the content of the body that was passed in.
triggerMultipartBody(0)['$content']
The final part is a call to the D365 custom connector, passing in the compose operation outputs

Another Custom Connector
You can’t call a webservice triggered flow from a PowerApp directly. You can call a Flow, but the flow doesn’t pass the appropriate parameters. It only deals with strings. You can’t convert your file to a string in PowerApps. I am obviously going to be proved wrong here, but I will learn. That’s one of the reasons I blog.
Hence, why you need to create a custom connector to pass from PowerApps to the Flow above.
Connectors can be created by uploading a swagger definition. Swagger is an open-source framework to document APIs and has been recently converted to the OpenAPI specification. Obviously connectors can be built from scratch, but because of the file upload that is required, a definition of the API is required.
Paul again comes to my rescue, he has a great blog post that he goes through in detail the file that was produced to support his video. In the Youtube post, he uses a tool that I can not find, but this file walkthrough was enough for me to produce my own file. I am not going to go through the detail here, Paul does a much better job.
In custom connectors, hit the +, then select Import an OpenAPI file.

Give your new connector a name and select your newly created file definition. If your file is correct, you are now presented with a pre-populated definition of your connector. The query parameters displayed include lots of configuration items that should be pre-populated from your Swagger file.

You can see the connector is not expecting a Body.
If you test the connector action there is also an extra parameter it is expecting

This File parameter is essential. Now it’s reading for use!
The PowerApp
To demonstrate the connector, create a new PowerApp. Because this is for the contact entity, use a drop down to get a list of Contacts to attach the note to from D365.

Associate this with D365 using the Common Data Service

Select the Contacts Entity, back in the properties of the control, use Full Name as the Value. Next, add a “Add Picture” control.

Also add a datatable. This time connect to the Annotation (Notes) entity in D365. Make sure you use the D365 connector though. For some reason, the Common Data Service connector does not return the Regarding as a field you can use. Select a few relevant fields, Title, Note, File Name and Document.
In the Values field, filter the datatable by the Contact that is selected in the dropdown and only show those where there is an attachment.
Filter(Notes, Regarding = GUID(ContactDD.Selected.Contact) && !IsBlank(Document))
Selecting a contact now should deliver a list of notes that are attached to that record.
To Upload a document, add a button. This will trigger the custom connector, so this needs to be added to the PowerApp. Select Data sources, add data source
The custom connector that was created earlier should appear. Select it.

In the button OnSelect action, if all is well, enter the name of the connector and action and it should give you a list of parameters you need.

The final call to the connector looks like this
FileUploader.UploadFile(
    AddMediaButton1.FileName,
    ContactDD.Selected.Contact,
    "Added from PowerApps",
    "Added from PowerApps",
    UploadedImage1.Image
);
Refresh(Notes)
The filename comes from the control within the Image upload control, the contact Id is from the selected contact, some text stuff to fill out (you could add a text control to take that input obviously) and then the image.
I refresh the notes data set after I am done so that the list has got the data.
So that’s it, a complicated solution to a “bug/feature” currently in Powerapps.

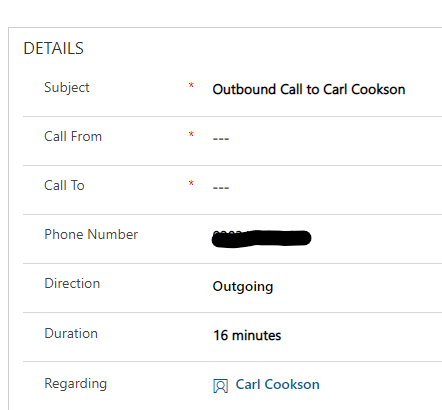
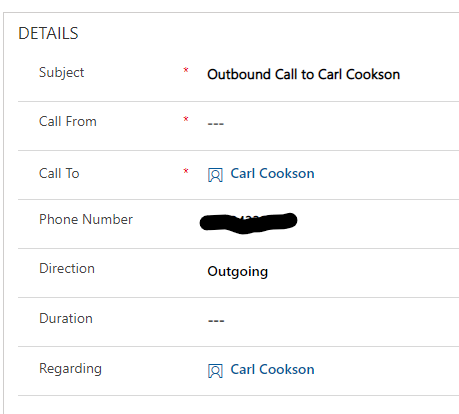
A screenshot of that squirrel note against the contact in D365, just so you know I am not bluffing.

BTW, squirrels are evil, rats with marketing, don’t believe everything @dynamiccrmcat says, though it is probably just squirrels she is wrong about.